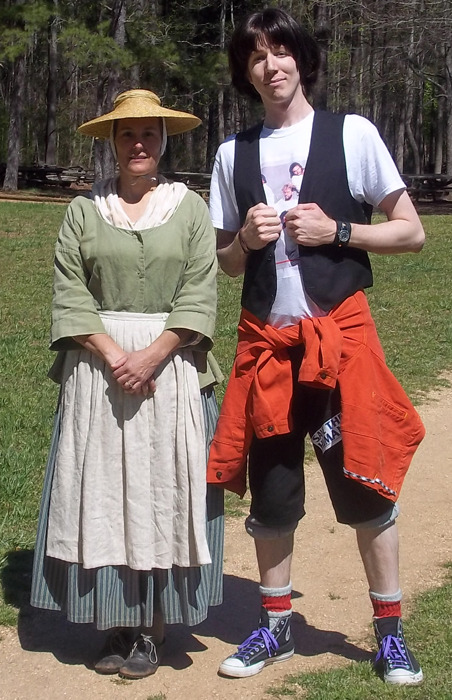
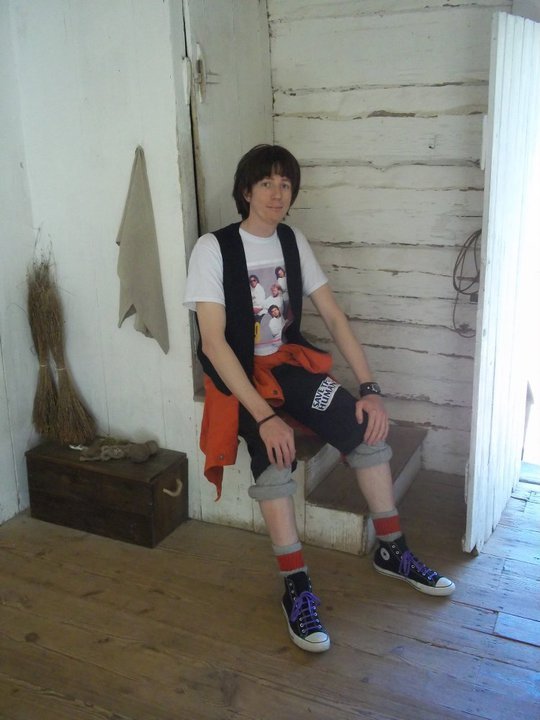
Creativedude's Excellent Ted Cosplay!

This outstanding rundown of Steven (aka creativeguy aka creativedude)'s Ted costume was recently posted on our Forums, but he has given us permission to share his story on his own Fans Gallery Page, and we're most excited about this!  It's totally outstanding to be able to hear one fan's story of creating their costume totally from scratch, so without further ado, here's Creativedude to tell you all about it!

I've been working on my own Ted costume for a while now.  Almost finished.  Just need the socks, watch, and shoe laces.

This is also my way of giving back to this excellent site and to the most excellent babe that runs it!  The
How To section of the site helped me out a lot and I hope that this info can contribute a lot to the site and give fans more info on making Ted's costume.

The Shirt: I used the graphic found
here that is posted on the Ted Excellent Adventure Costume Page of this very website.  I then found a good scan / photo of the Album cover using the same image on E-bay and took them both into Photoshop and combined them, adding missing detail that the image above didn't include.

Here is a link to the image I made with
those two images:

This is actually my second shirt.  I had to make the first one myself and I made the image way too small.  Upped the size on this one.  I actually really want a real original shirt and have tried searching all over the internet and locally for one but they seem to be extremely rare.  I'd toss this one in a minute for an original.  I had to make this by printing it out onto iron on paper.  It's actually in 4 sections because of the paper size limitations.

Here is a photo of my final shirt:

------------------------------------------------------------------------------------------------

The Vest: I searched thrift stores again and again to find this.  It's not an exact match but it's close.

Photo of my vest:

------------------------------------------------------------------------------------------------

The Shorts: Yep, I made them from dress pants purchased at a thrift store.  Cut them down and sewed them up.  Made the stickers on my computer and printed them out.  Got the graphic for the bumper sticker on this website.  Again, thanks for the info and help!  This site rocks!  Made the smiley face in photoshop myself.  Printed them on iron on fabric.  It's more durable than the real thing.  I know that the site says the bumper sticker is actually green but I like the blue and haven't seen proof that it's green and it looks pretty blue on screen.  Either way I like the sticker. Might change it to green if more info on that comes out.


------------------------------------------------------------------------------------------------

The Shoes: Got these just for the costume and like them a lot.  I call them my fun shoes.  Ha ha.  Couldn't find proper colored purple laces for them so I bought a pair of white laces and used a purple sharpie to dye them.  Ted's shoes are straight laced.  I determined this by using screencaps I took off my DVD.

Screencap showing straight laced shoes:


Photo of my shoes:

His shoes appear to only be laced up to the 3rd eyelets from the top.  The current laces I have are too long though so I need to buy shorter whiter ones.
------------------------------------------------------------------------------------------------

The Jacket: Another thrift store find.  It took a long time to find this but I finally hit it close this week.  The jacket is a BOSS brand jacket.  I doubt its the same brand from the film, it might be . . . I don't know, but its pretty close if it's not.  The jacket in the film often appears to be red or even orange / red.  I dyed the yellow jacket with red RIT dye and it came up with a nice orange / red.  I've removed the "BOSS" logo from the front and back of the jacket.  You can see the logo just above the pocket in the photo.  Ted's jacket has no logos as far as I can tell.

My jacket before dyeing it:


Photo of my Jacket after dyeing it with screencaps I took to show comparison of color:


I wrote Wyld Stallyns on the right sleeve using screencaps I took to try to get it close to the real thing.  I also purchased shoelaces that match the ones he has hanging from his jacket in the film.

Here is a showing the writing on my jacket compared to the screencaps:

I then bought a vintage pair of shoe laces online.  They have the correct pattern but the width of the laces is too small.  I'll be upgrading to correct ones if I happen to find any in time.

Here is a photo of my finished jacket:

------------------------------------------------------------------------------------------------

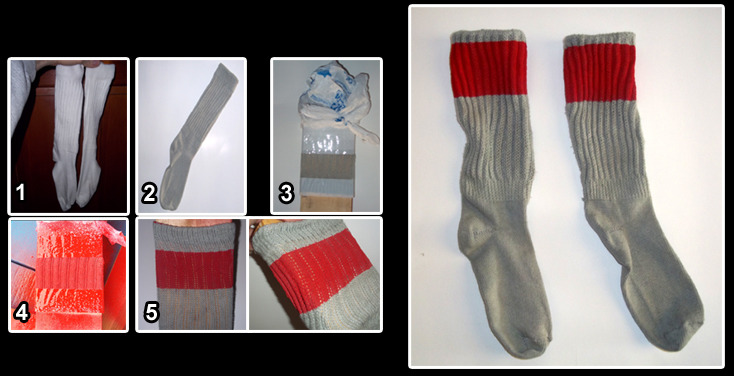
The Socks: Ted's socks are particularly thick and bulky.  I tried to find socks like his in thrift stores all over my area.  I have had no luck.  Finally I found womens' slouch socks.

I purchased a pair today and dyed them gray.  Things were going well for me but then I tried to use an aerosol can of fabric paint on them to make the red stripe on each sock.  I guess I didn't shake the can long enough, or maybe it was a bad batch, but it squirted out like ketchup onto the socks and ruined them.

I got angry but then I got motivated.  I went back to the store I got the socks at and bought TWO pairs of them, in case another mess up happens and then I went to the craft store and purchased spray on fabric paint in a pump bottle.  I tested that pump bottle version on the (now ruined) first set of socks I had and it works great.  Much more control over the amount of paint that comes out.  I recommend you do NOT use the paint in a can.  Get the pump.  Tomorrow after work I will be dyeing the new pair of socks again and hopefully the second attempt to get the socks painted will work out well.

So along with finishing the socks, I just need to get the proper watch with leather band and get those shoe laces going.  Oh, my bracelets are just leather strips tied around my wrist.  Took screencaps of those, too.  Those things are pretty simple in design.


Ted Theodore Logan socks = finished!  Step 1: Buy ladies slouch socks, because you can't find big puffy mens 80's socks many places these days that look like Ted's.  Step 2: Dye socks pearl gray with RIT dye.  Step 3: Purchase Tulip Fabric Spray, (the pump kind!), Christmas Red.  Step 4: Stretch socks over form and mask off areas you don't want painted red with tape, etc.  Step 5: Lightly spray mist onto sock.  Let dry, repeat until color is strong.  Step 6: Remove tape / plastic used to mask off rest of sock and let item dry.  Use hair dryer to increase drying time.
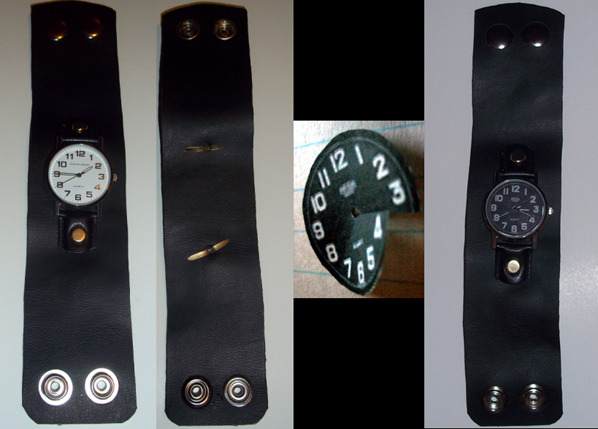
Here is my watch and a bit on how I made it.  It's not 100% accurate but it works well and gets the point across.  I wish I knew what exact watch he was wearing haha.

What you will need to make it:

One cheap watch.

Some black leather or vinyl.

Heavy Duty Snaps.

Paper Fasteners

Scissors.

I bought my watch at a local store near here.  It was only $5.00.

I cut down the straps that were already attached to the watch and then punched holes into each of them.  The paper fasteners will go through these holes to attach the watch to the large strap.

For the large strap/wrist band I got some black vinyl and glued the white fabric sides together, leaving only the black showing.  I then punched holes for and attached the heavy duty snaps.  I rounded off the ends of the large strap with scissors.

Then I punched holes for the paper fasteners to go though and attached the main watch face to the large strap.

My watch originally had a white watch face but Ted's watch has a black watch face.  To fix this I found an image of a watch face online and took it into photoshop, removed the hands and scaled it to fit into my watch.  I then printed it out and cut it to fit inside the watch, leaving a nice small slice through it to allow it to fit around the centerpiece of the watch hands.


Photos of my finished costume coming soon!!!!!!  Photoshoot happening today if all goes as planned!


I have a lot of photos but I'm only posting a few for the moment.  Here are some that were taken today!
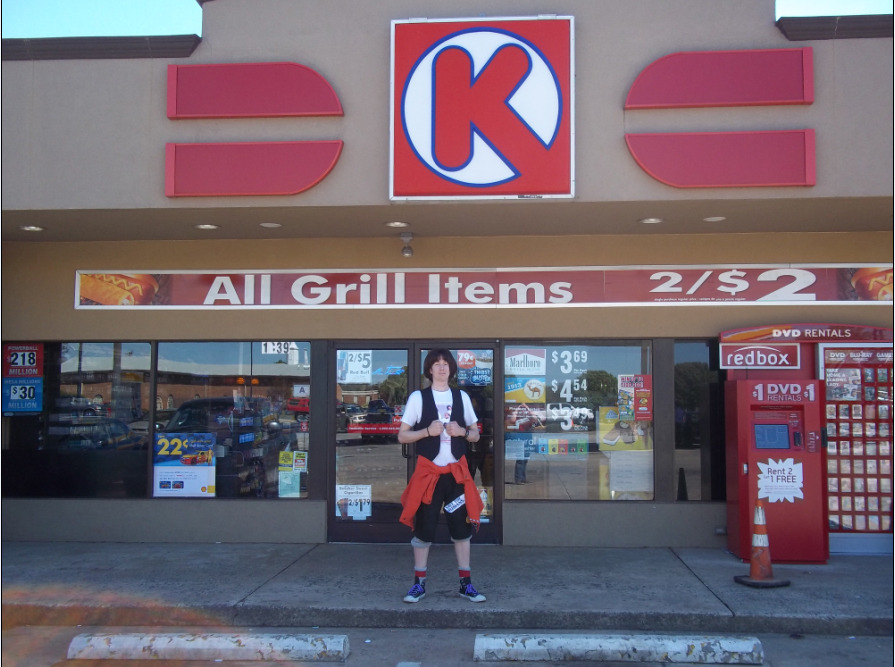


Bill, are you in there?
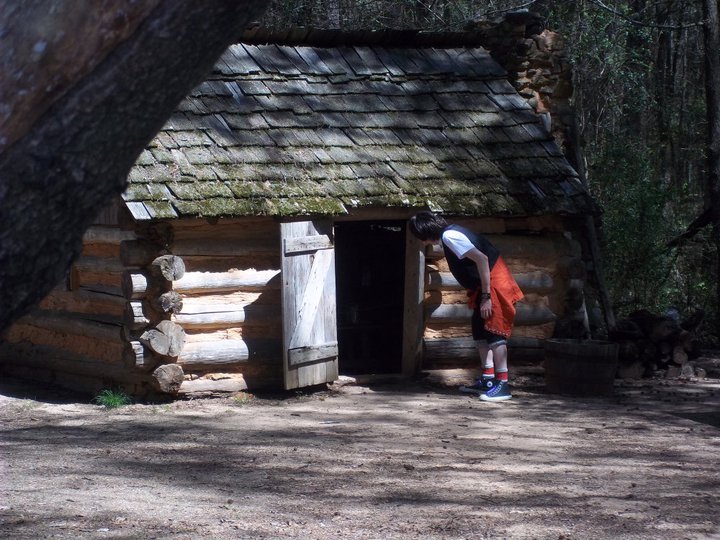
Food?  Excellent!
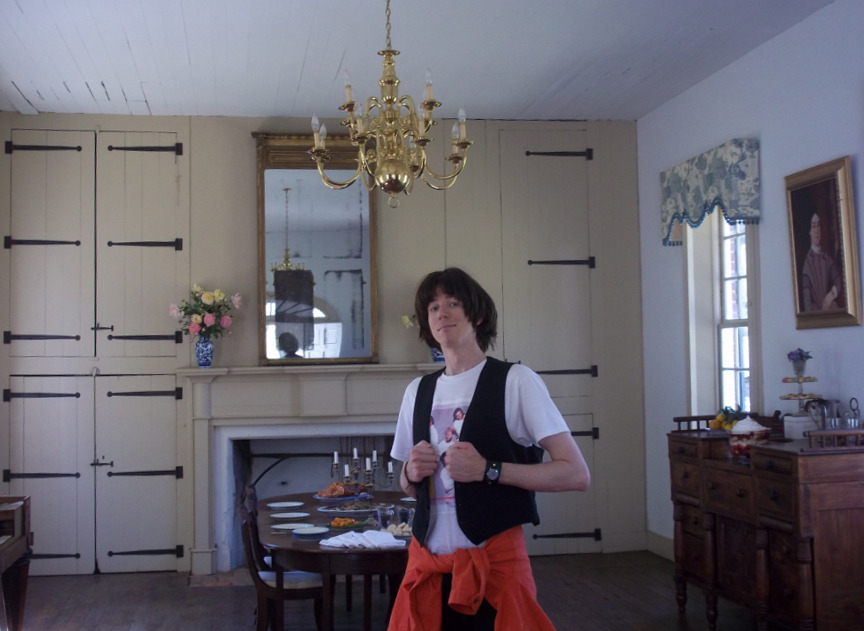
Somewhere in time . . . .
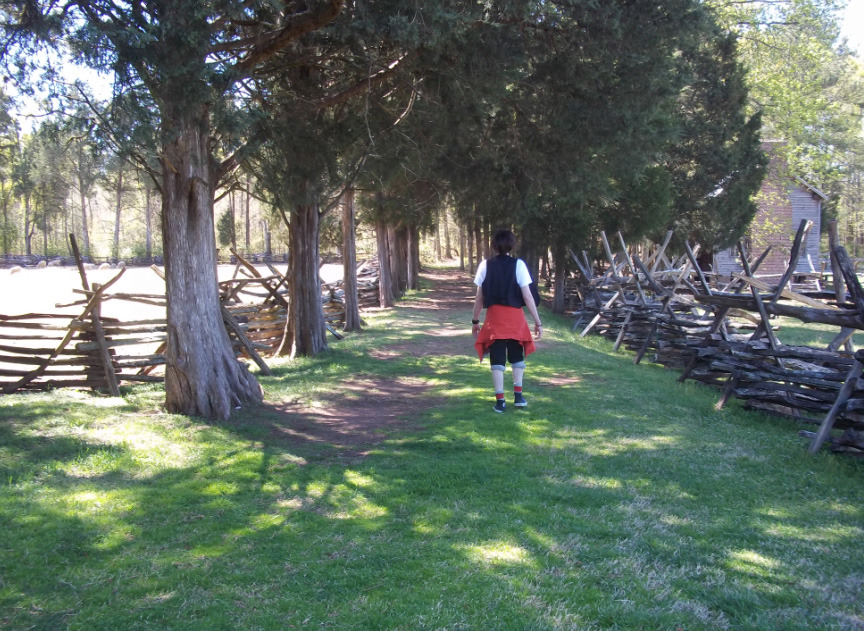

It begins: The Bill and Ted's Excellent Adventure Phone booth.

I guess I just couldn't stop with making the Ted Theodore Logan costume . . .. and I have now moved onto making the actual booth.  I know the things come pre-made but they are hard to find and pricey so I'll be building my own booth.

First things first . . . I had to find a phone for my booth.  Needed to be the right style, have the coin slot and change return lever in the right positions.

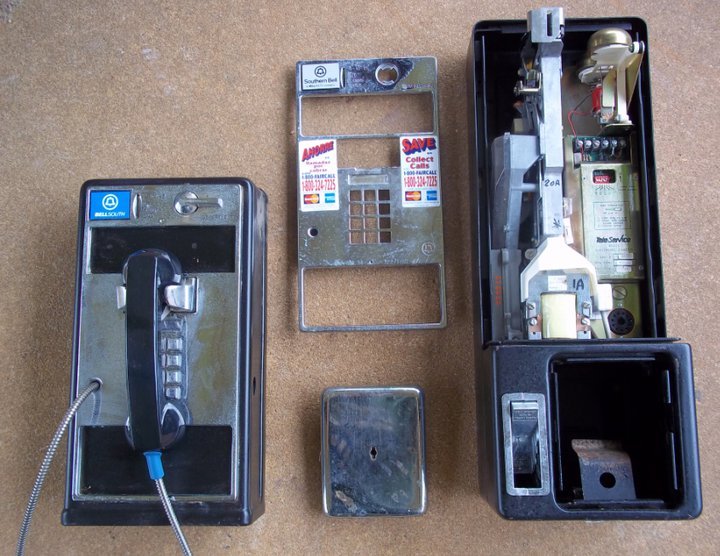
I managed to buy a payphone on eBay.  I got it for $45.00.  The shipping would have been $60.00 but I drove about an hour and 45 minutes from here and just picked it up myself.  I'm sure glad I did.  The guy had a bunch of payphones, all old, all needing cleaned up.  Instead of just having me get the one in the photo of the auction he let me look around and pick what I needed.  That rocked because I ended up getting an even more accurate phone than I would have.  It's the correct model, has no volume control, and has the chrome lockbox, with no logo on it.  The only thing it didn't have was the little Bell logo on the front.  I asked him if he had another faceplate with that on it and managed to get one from him for $10.00.

Everything was a bit rough looking and needed a bit of a cleaning.

I got it home and wiped it all down with some good antibacterial cleaner.  Man . . . that thing was filthy!

Here are some photos of the phone so far.  I'm still adjusting the graphics for the phone and still working on getting the 8 and # keys to light up.  Probably going to have to cast them in clear resin or something.

After the phone itself is finished work on the booth will begin.

Photos:

1. All the parts.

2. Phone stripped down with proper panel on it.
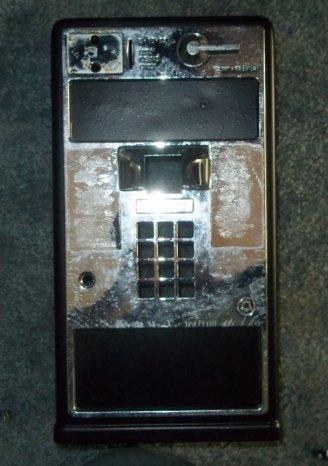

3. Phone cleaned, polished and reassembled.  Still need to adjust the graphics on the info card a bit.  The 20 looks too large.
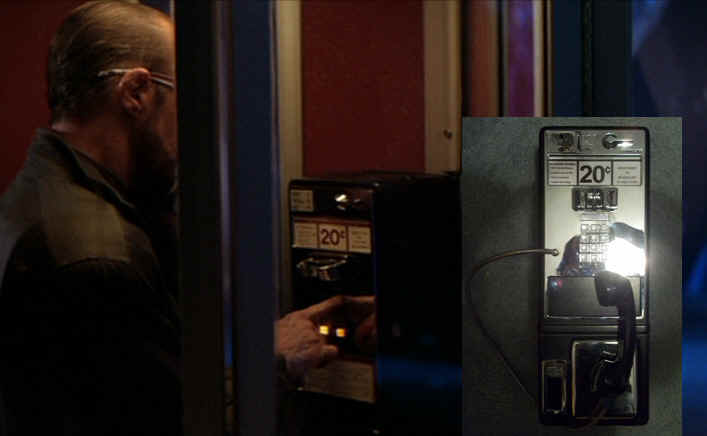

A bit more info . . .

Still need to make some adjustments and add the lights but here is my phone so far.
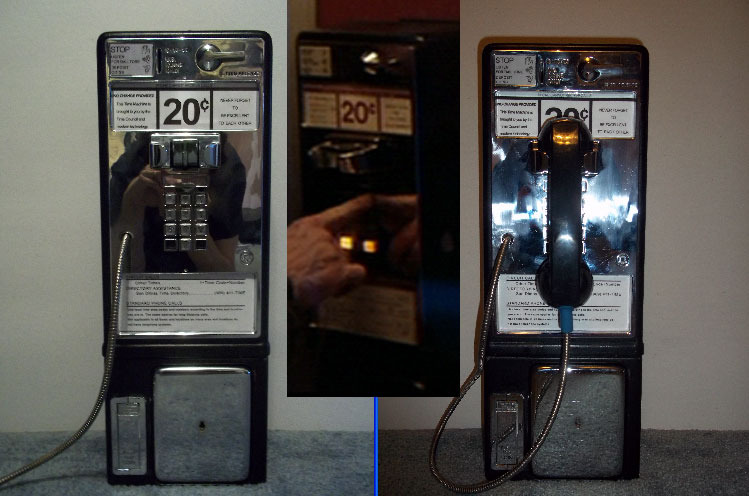

Also I just made my first phone call from my pay phone to my cell phone days ago.  First test was a success except that I could hear everything, including the automated operator voice but the volume was very low.  But the volume was real loud when dialing though.  Going to see if there's a way to adjust the volume for the handset.  Tomorrow when everyone is awake I'll call the house and see if the payphone rings.  Right now it's disconnected.

Today I added lights to the phone.  I noticed that in the film when Rufus presses the buttons before traveling back in time that the two light up buttons are actually shorter than the rest of the buttons on the phone.  I also notice that they don't move inward, but that he just places his fingers on them as if he's pushing them.

I currently have light up "buttons" on my phone now but they are constantly on unless I turn them off with the switch that comes from the power supply for them.  I noticed that in the film the lights do not come on until he lifts the phone from the hook.  This will be easy for me to set up on my phone as well, as it just requires adding more wire and some metal plates to connect when the hookswitch moves.  Excellent!!

Thanks so much, Creativedude, for letting us share your excellent costume story!
You can e-mail him by clicking
here, or visit his Cosplay.com profile
as well as the
Silent Hill Cosplay website!


Continue to the next Fans Gallery Page . . .